In an earlier post I documented my process of making a travel photo book and used my recent trip to France as an example. If you missed it, you can read my post here. Now I want to explain in more detail how to make your travelogue extra special by including mementos you gathered during your trip, in digital scrapbook fashion.
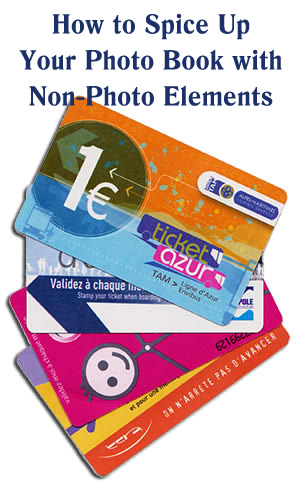 Typically these mementos will be of the paper variety, called ephemera. It definitely was in my case since I traveled to France with only a carry-on size bag – for three weeks! It was all I could do to shut my clothes-crammed suitcase (travel “space bags” saved me), let alone tote a bunch of souvenirs. However, my suitcase has an outside zippered compartment perfect for holding paper items. So I saved museum ticket stubs, menus, brochures, colorful bus receipts like the ones in the photo on the left, maps, train and plane tickets etc., and even receipts and a plastic bag from my favorite French grocery store, Carrefour.
I like to save this kind of stuff from every trip because it helps me tell my story, jogs my memory on the details and puts the finishing touch on my photo book. If you are a scrapbooker, you know just what I’m talking about.
What to Collect
 You can use your imagination here, depending on what kind of trip you are taking. Save maps, brochures from hotels, ticket stubs from museums and attractions. Ask for a menu a restaurant you especially enjoyed. Most restaurant would be happy to give you a souvenir menu. If not, snag a business card.
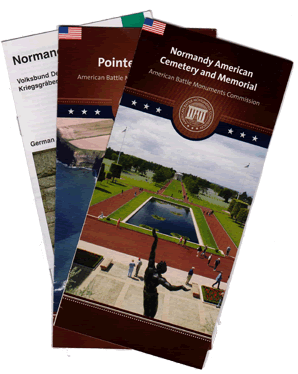
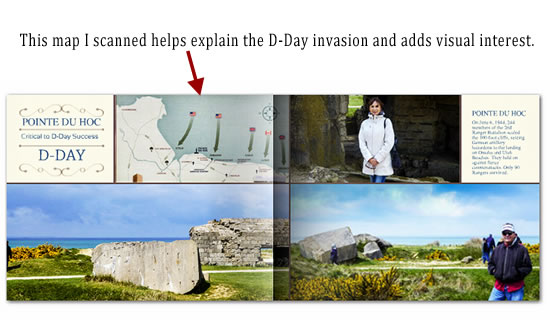
If you are visiting historic sites, be sure to save brochures. They can help jog your memory on important details you’ll want to include in your travel book. For example, we visited the D-Day sites in Normandy. During this full-day tour we saw and learned so much, it was impossible to retain all the details. Thankfully I have some brochures to sites such as Pont du Hoc, where 225 Rangers were charged with scaling sheer cliffs and securing enemy guns. Sure, I could get some info from Wikipedia, but it was nice to have the brochure with some additional photos, small maps and an explanation of the importance of the site.
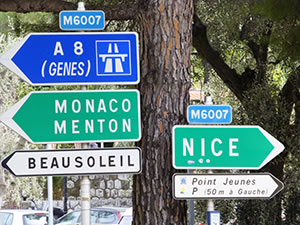 You could even take photos of significant signs such as this one I took on the French Riviera, which helps set the geographic stage. Taking pics of the plaques on monuments will help you remember important details later. I did this at the American Cemetery and Museum, as well as when visiting Pearl Harbor and the U.S.S. Missouri a couple years ago.
Take Notes as You Travel
I don’t know about you, but sometimes my memory on details gets a touch faulty. That’s why jotting down quick notes during your trip can help you later with photo captions and journal entries. I kept a small notebook with me for that purpose.
Scan Your Mementos
Since we are making digital scrapbooks instead of traditional paper scrapbooks, you’ll need to either scan or take photos of all your mementos so you can incorporate them into your book.
Scanning tips:
- Using glass cleaner, clean your scanner glass of any dust or fingerprints before starting.
- Set the color mode to 16-bit color for good results. For even better quality you can use 24-bit or higher, though the file size will be larger.
- I recommend using a 300dpi jpeg setting to ensure sharp images. If you use higher than 300dpi, that is fine, but it’s not necessary and it will take up a lot more space on your computer.
- Be sure to use jpeg format, as that is the standard image format accepted by all the online photo book services (there is an exception that I will discuss below).
- Save all scans to a special folder so you can find them later and label it something memorable, i.e. “Hawaii memento scans.”
If you brought back souvenirs that you want to include in your photo book, you can take photos of them. For example, if you bought a beautiful scarf in India, have someone take a picture of you wearing it, preferably while you are still in India! I bought some divine herb-infused olive oil in France, so I took a close-up of the bottle I purchased to accompany pictures of us olive oil tasting inside a lovely little shop.
How to Use Your Scanned Elements
 Once you have scanned your mementos as jpegs, you can upload them to your account at your favorite photo company just like any other picture. Services like Shutterfly
, Snapfish
and Picaboo have software that enables you to place, move and re-size images anywhere on the page. I particularly like using Mixbook.com for digital scrapbook-style photo books. Their photo editor allows me to upload my scanned mementos into a sticker gallery so I can use them like any other embellishment. You can also customize absolutely everything on the page. A note about using elements as stickers with Mixbook: after scanning your element, you will need to open it in your image editor and save it as a png file for best results. This will eliminate the white background and allow the background to be clear. That’s important if you scrapbook piece has irregular edges. If your element is square or rectangular, you can upload a jpeg and use it like a photo. Mixbook is the only company that I am aware of that allows you to upload PNGs. If you know of another one, please tell me in the comments.
The software used by online photo companies has gotten more sophisticated in recent years. You can add drop shadows to your elements to make them stand out, just like any other photo. Mixbook, Picaboo and Shutterfly’s Custom path features drop shadows, the ability to adjust the opacity and stack text and images in layers for really interesting effects.
Have fun with it! If you have any other suggestions for using non-photo elements in your photo book, post them in the comments section below.
Related Posts
Creating a One-of-a-Kind Vacation Photo Book That Tells Your Story


